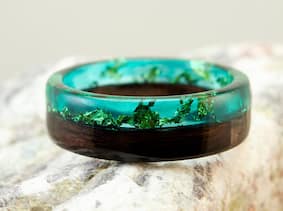

Ever fancied creating your custom artwork? Well, you’re in luck! Today, we’re diving into the world of resin art, specifically focusing on crafting unique and personalised resin rings. It’s a fun and creative DIY art project that you can easily do at home.
Before we start, let’s gather all the necessary materials. Here’s what you’ll need:
First, we need to prepare our resin ring moulds. Make sure they’re clean and dry. Any dust or debris can affect the final result of your resin rings. If you want to make the demolding process easier, you can use a mould release spray. This helps prevent the resin from sticking to the mould.
Next, we’ll mix our casting resin. Follow the instructions provided by the manufacturer. Remember, it’s crucial to get the right ratio of resin and hardener to ensure a successful cure. If you’re unsure about how to mix resin, you can check out this guide. Stir the mixture slowly to avoid creating bubbles.
Once your resin is mixed, you can add colour or glitter if you wish. This is where you can get creative! Stir in your chosen additives until you achieve the desired effect. Then, carefully pour the resin into your ring moulds. Be sure not to overfill them! You want the resin to be level with the top of the mould.
Allow your resin to cure. The curing time can vary depending on the type of resin you’re using, so it’s best to refer to the manufacturer’s instructions. You can check out this guide for more information about resin curing time. It’s important to let the resin fully cure to ensure your rings are solid and durable.
Use a heat gun to sweep over the surface of your mould, effectively eliminating any bubbles. Be sure to check back after 15 and 30 minutes, as bubbles can often reappear unexpectedly.
Once the resin is fully cured, you can de-mould your rings. Gently flex the mould to release the rings. If you notice any sharp edges, you can sand them down for a smoother finish. Check out this guide on how to sand resin. For a glossy finish, you can apply a coat of doming resin to your rings.
And there you have it! Your very own custom resin rings. Remember, practice makes perfect. Don’t be disheartened if your first few attempts don’t turn out as expected. Keep experimenting with different colours and techniques, and most importantly, have fun with them!
For more DIY art and resin artwork tips, stay tuned to our blog. Happy crafting!